Almost since the beginning of Amazon Web Services (AWS), there has been Amazon Linux powering it. Amazon Linux has always been their own flavour of Red Hat’s community edition of Fedora Linux, tweaked and optimized for Amazon’s requirements. Towards the back end of 2017 AWS released a version of the Amazon Linux 2 AMI for use in your own environment. Amazon provides a ‘Running Amazon Linux 2 as a Virtual Machine On-Premises‘ guide of their own, while it’s very good, but despite this it is somewhat lacking in a number of areas. For this reason I’ve put together my own ‘Amazon Linux 2 on Premise Installation Guide’, which I hope fills in the gaps.
Amazon Linux 2 on Premise Installation Guide – Assumptions
- You are using Mac OS
- The on-premise environment is being setup up using VMware. In my case VMfusion
- You have a basic understanding of the Mac terminal and Amazon Linux 2 environments.
Getting Started
- First of all, download the example seed.iso file from Amazon
The seed.iso contains the required user and network settings for your environment and will be used on first boot up. Your seed.iso will contain two files meta-data and user-data.
Setting up your files
- Now we will create your configuration files to use in the seed.iso
- Create a folder called ‘seedconfig’ and remember where you created it
- Double click on the seed.iso to mount the file and see the enclosed configuration files
- Copy these two files to your newly created ‘seedconfig’ folder. Do not try and edit these two files in a text editor, consequently if you do, none of your settings will be applied.
Editing Your Configuration Files
Meta-data Configuration
- Open ‘Terminal’ on your Mac
- Change the directory to where you downloaded the seed.iso. Example: cd /users/your.account/seedconfig
- Now we can edit the first file ‘meta-data’. In the Terminal session type: sudo nano meta-data and you will now see a screen similar to that below
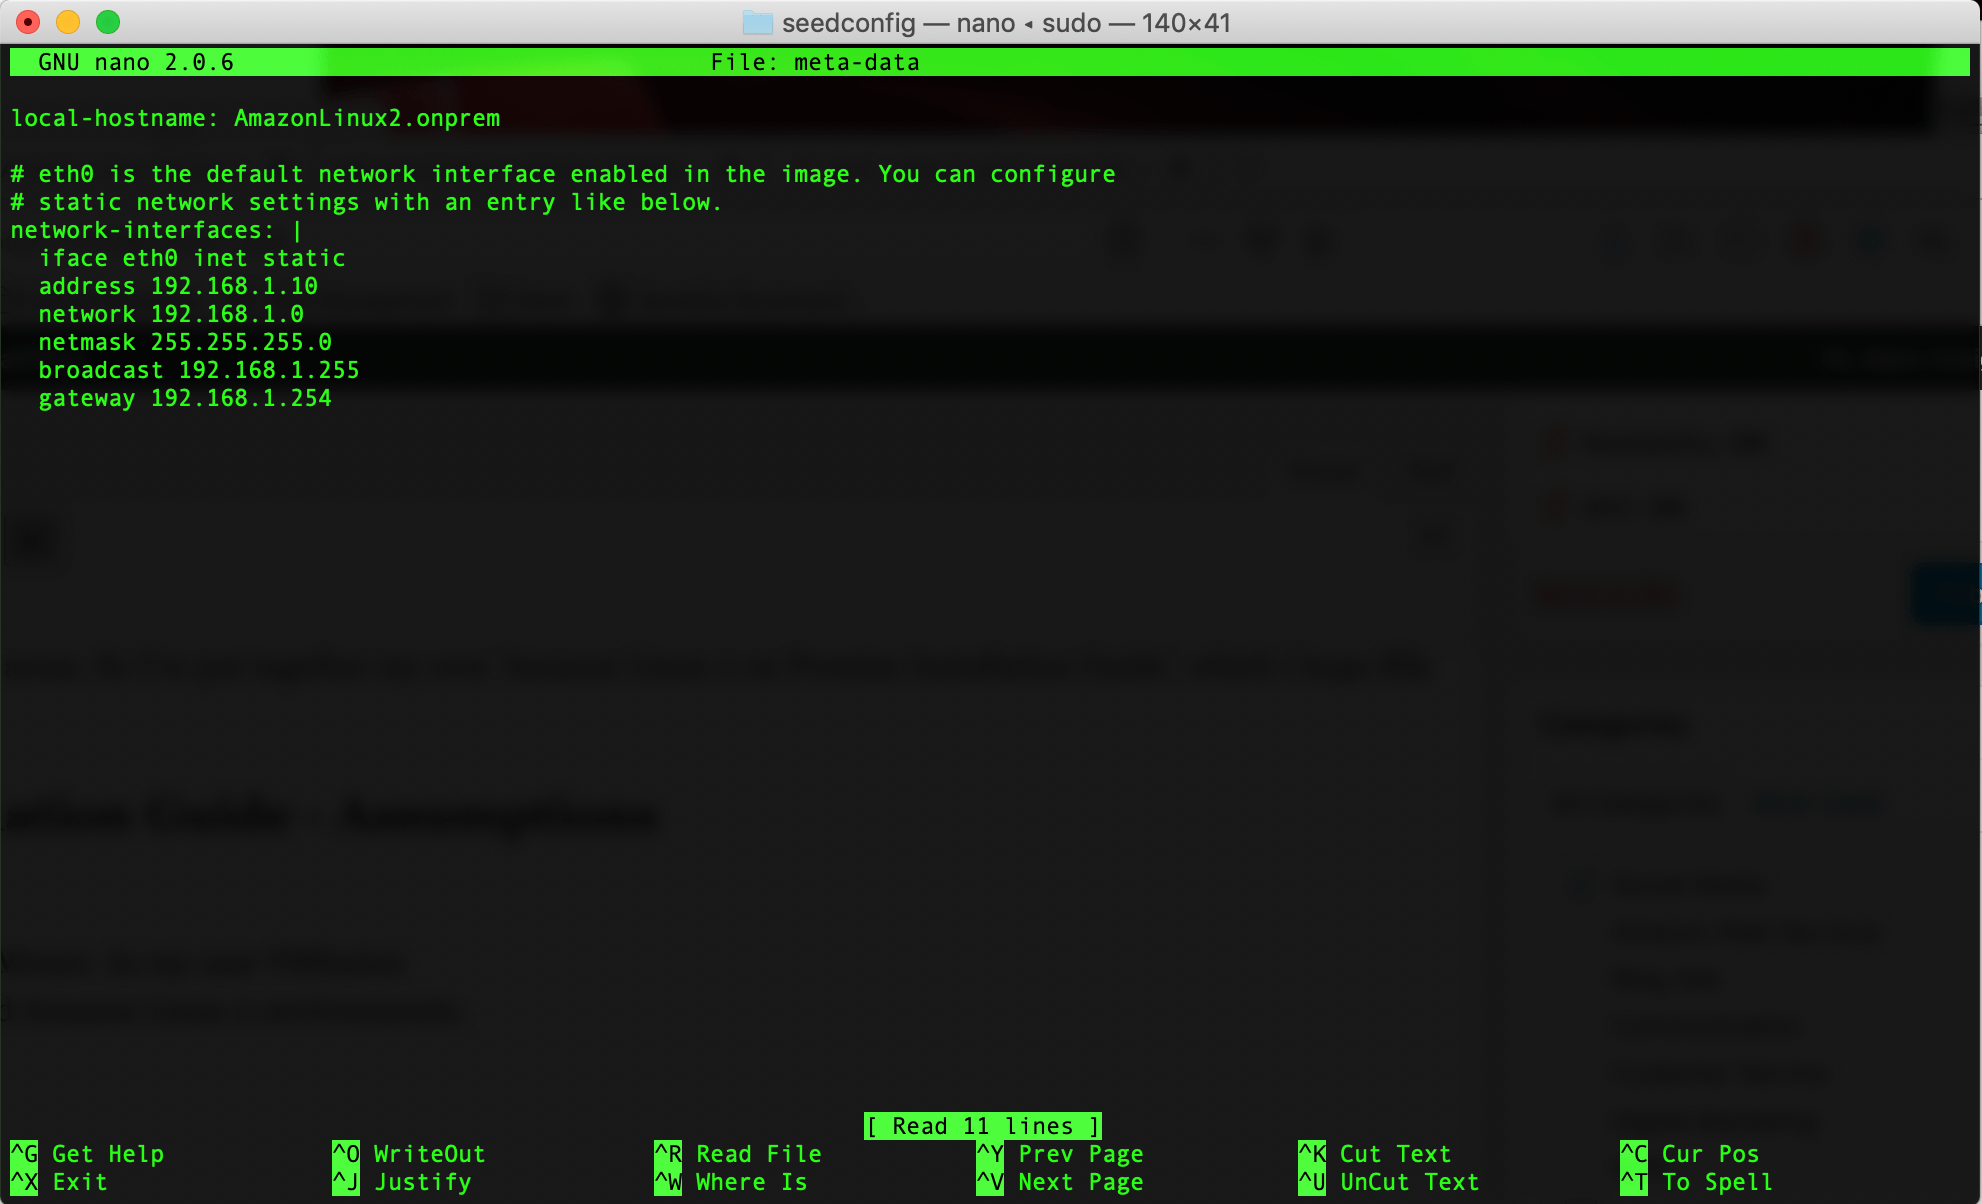
- Remove the ‘#’ from all but two lines in the image
- Rename your instance in the first line (if you wish) by changing the name after ‘local-hostname:’.
- Change each of the network settings as required. I didn’t, as they were ok for me
- Click ‘Control + O’ to save your change, pressing return to confirm the changes
- Exit this window by clicking ‘Control + X’.
User-data Configuration
- Now you can edit the second file ‘user-data’. In the Terminal session type: sudo nano user-data.
- Delete the contents of this file and replace them with (replacing ‘YourPasswordHere’ with your own secure password):
#cloud-config

#vim:syntax=yaml

users:

# A user by the name `ec2-user` is created in the image by default.

- default

chpasswd:

list: |

ec2-user:YourPasswordHere

# In the above line, do not add any spaces after 'ec2-user:'.
- You should now be left with the screen shown below
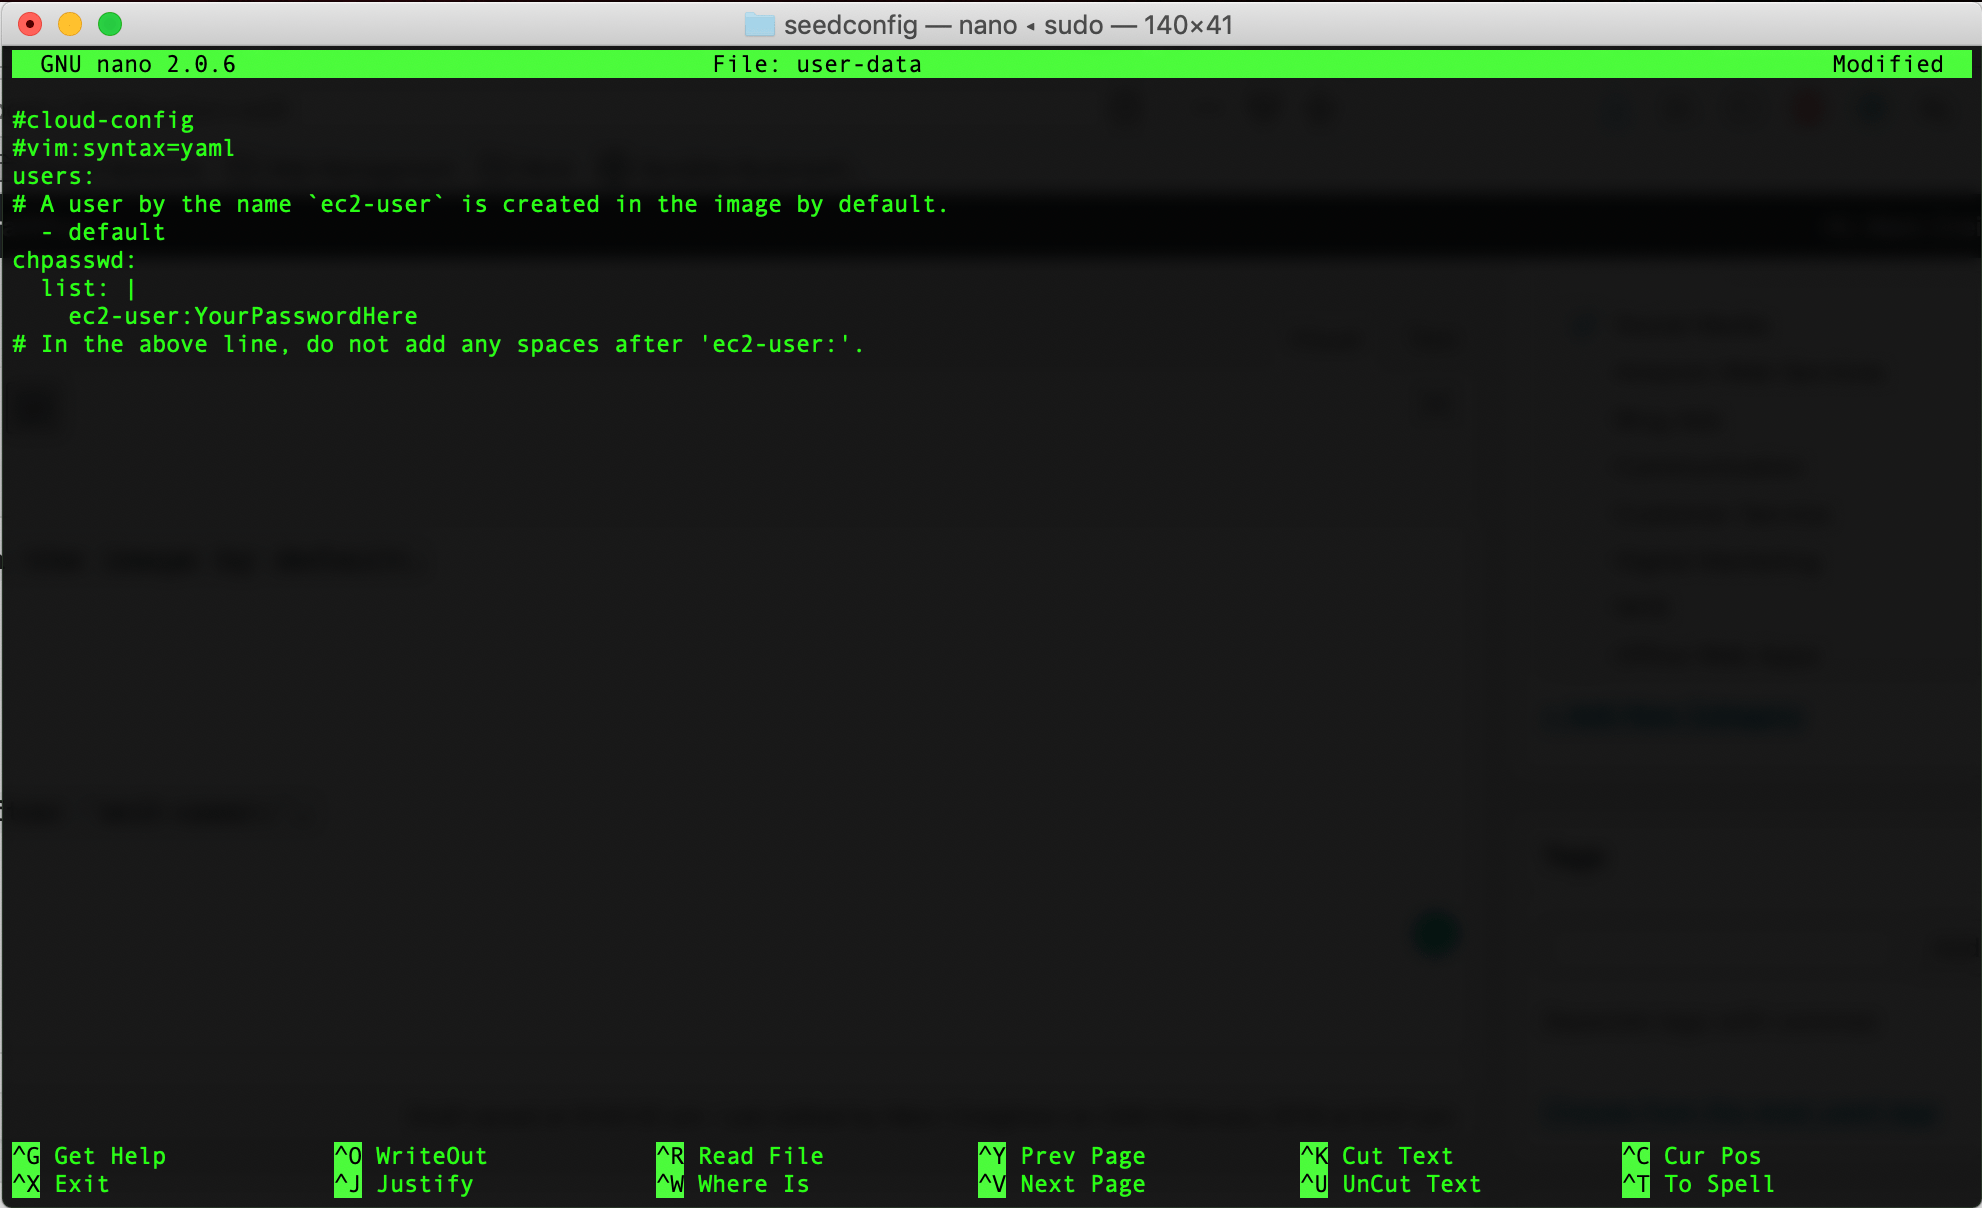
- Click ‘Control + O’ to save your change, pressing return to confirm the changes
- Exit this window by clicking ‘Control + X’.
Create the seed.iso Boot File
Now we generate the seed.iso boot image that we are going to use when the VM machine starts up.
- In the terminal window type:
hdiutil makehybrid -o seed.iso -hfs -joliet -iso -default-volume-name cidata seedconfig/
This will now generate an iso file named seed.iso in the folder you are currently in. Check this in ‘finder’.
Creating the Amazon Linux 2 VM Machine
Getting Started
- Download the latest Amazon Linux 2 image (official link) for VMware
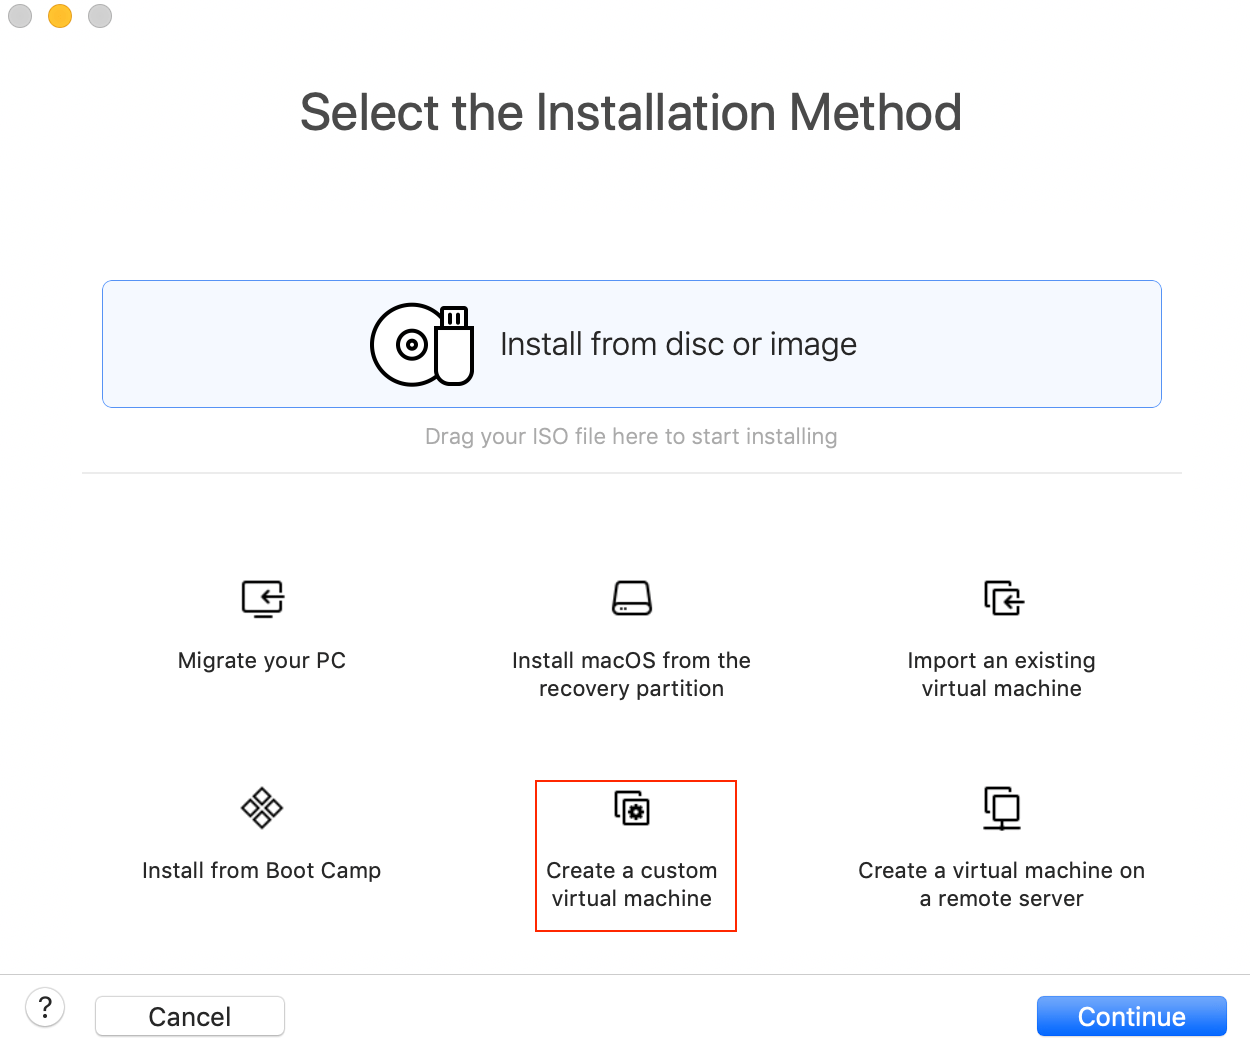
- Start VMfusion and choose ‘File > New>
- Now choose ‘Create a custom virtual machine’ and click ‘Continue’
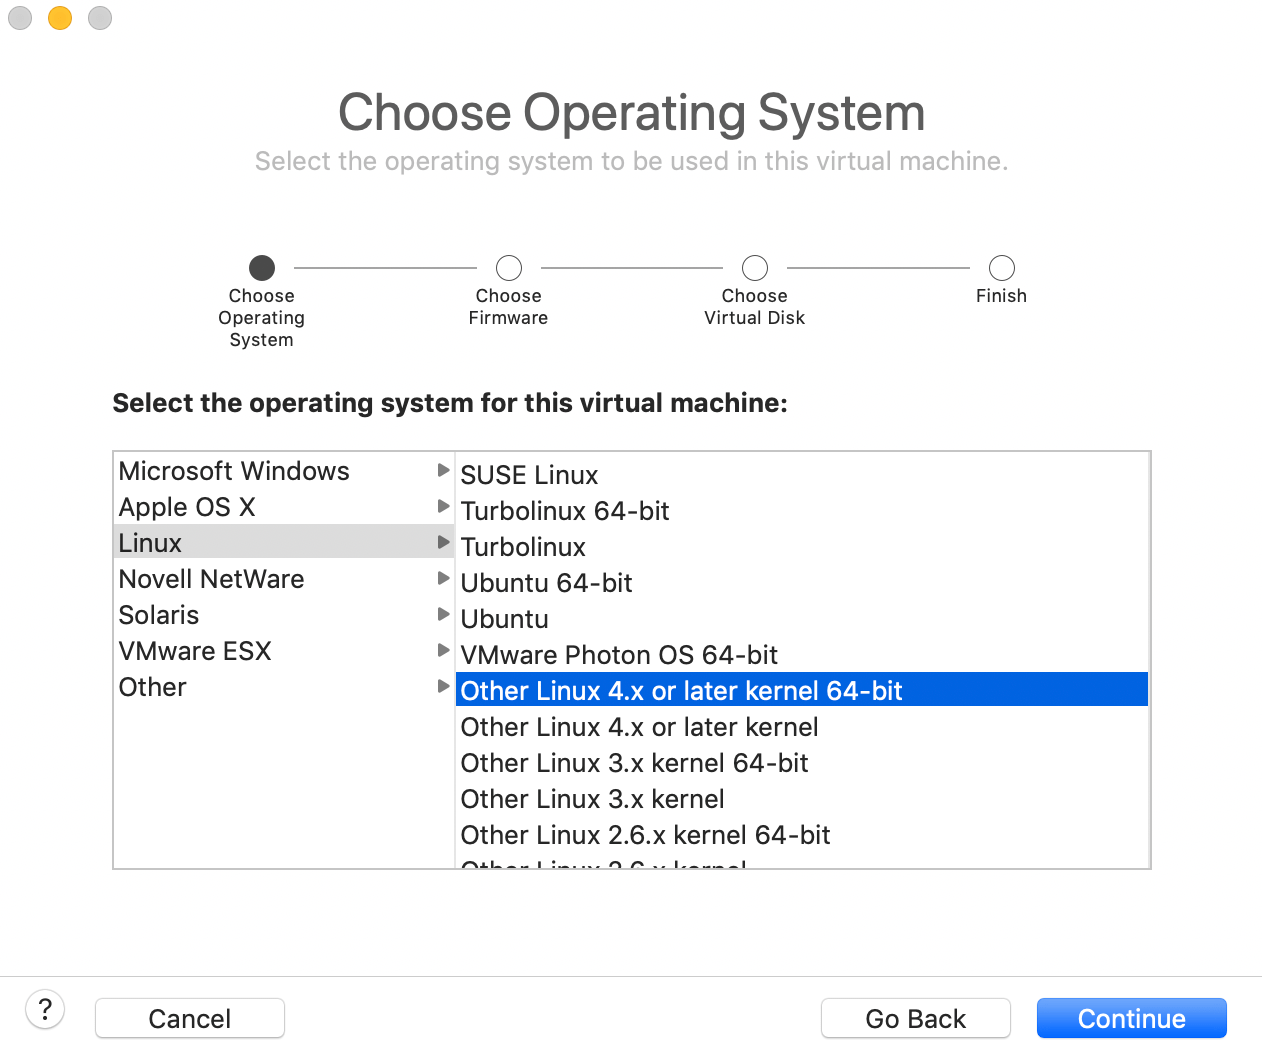
- Now select the Linux operating system as shown in the picture below and click ‘continue’
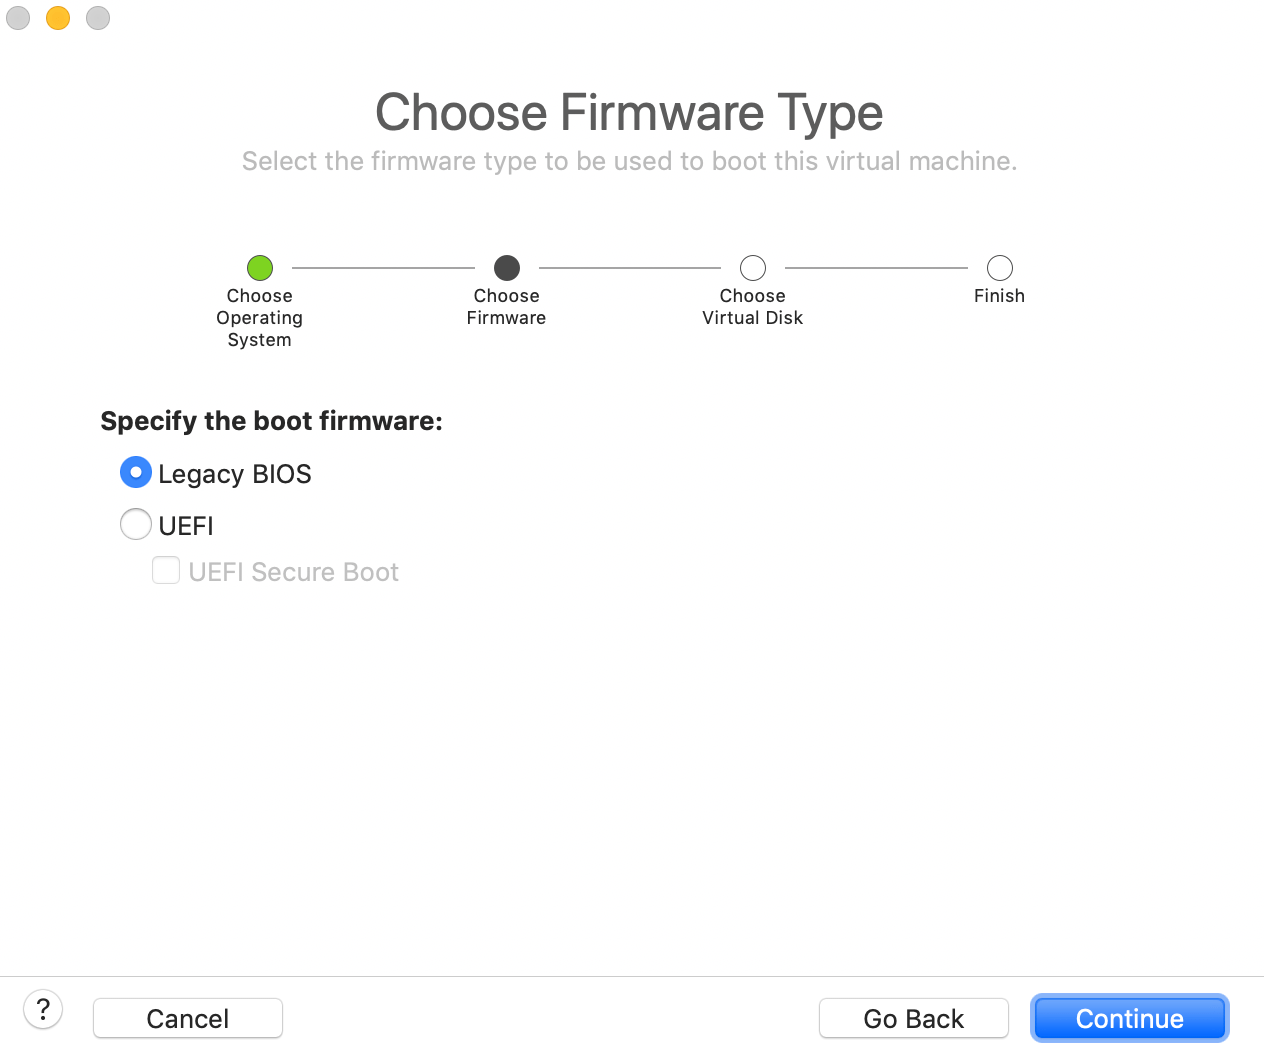
- Leave the ‘Choose Firmware Type’ settings as they are and click ‘continue’
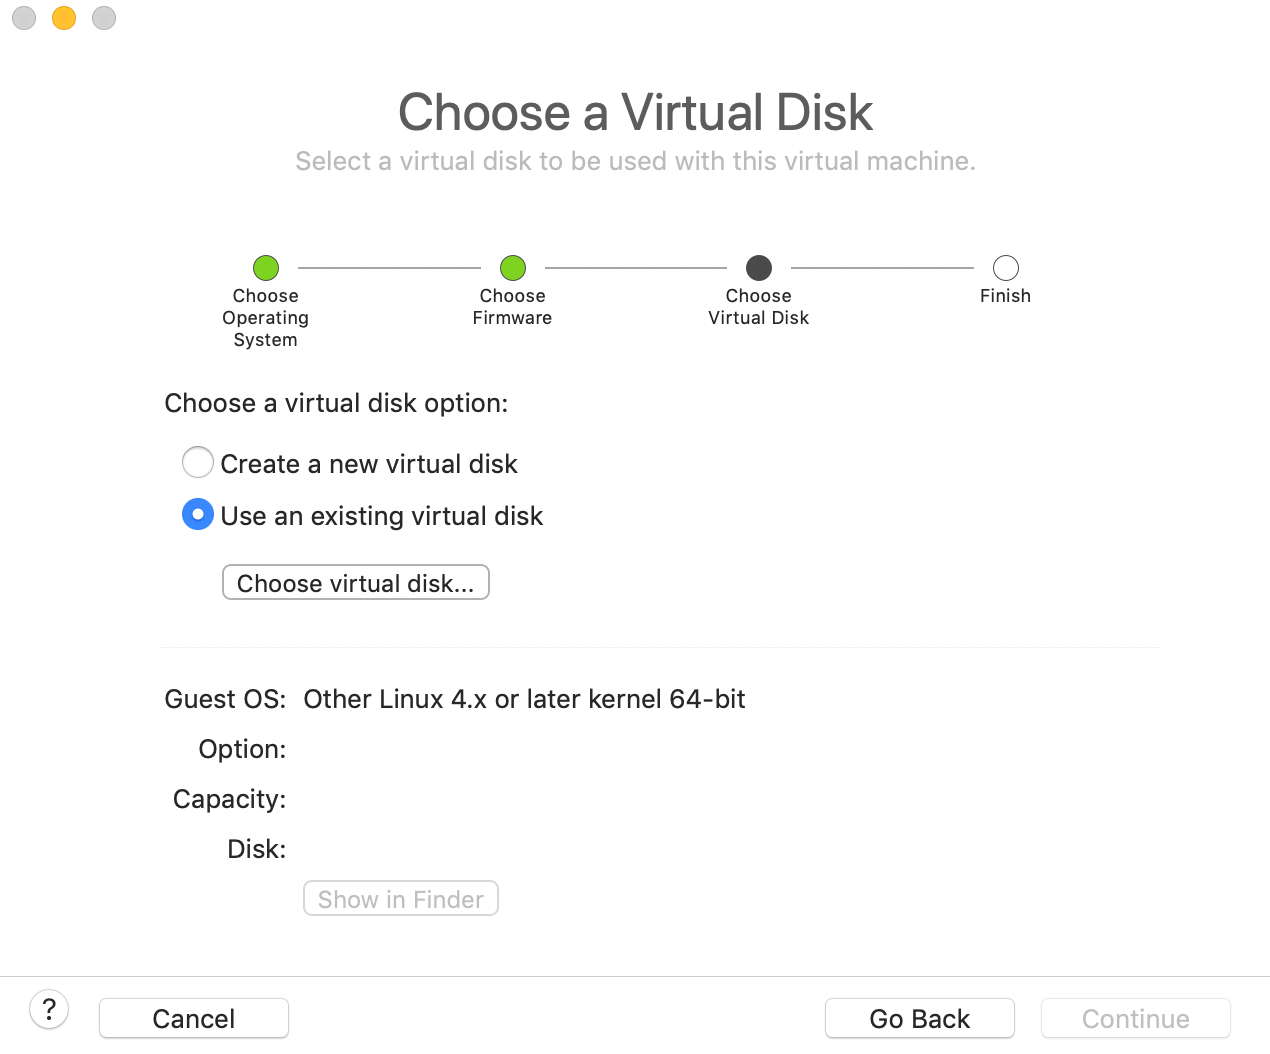
- From the ‘Choose a virtual disk’ window, click ‘use an existing disk’, then click ‘choose virtual disk…’. You will now be prompted to navigate to the Amazon Linux 2 .vmdk file you downloaded earlier.
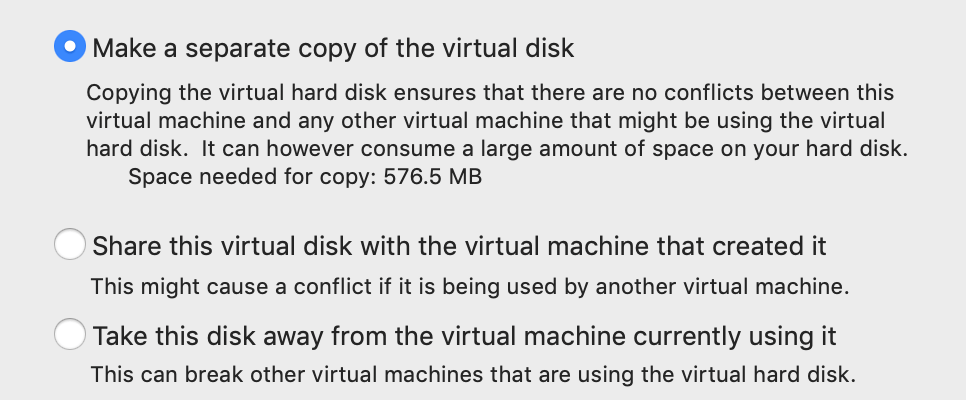
- While selecting your downloaded .vmdk file make sure that ‘make a separate copy of the virtual disk’ is selected at the bottom of the screen. In the event of the setup failing, you will be able to start over with downloading the .vmdk file again
- At the ‘Finish’ screen choose ‘Customise settings’. You should now be prompted to save your virtual machine file

- From the settings screen, choose ‘CD/DVD IDE’ and tick ‘Connect CD/DVD drive’. Further settings can also be changed from here, for example, RAM and processors
- From the drop-down select ‘Choose a disc or disc image’, from the resultant pop up locate and select the seed.iso file you created earlier and close this window

- Your machine is now ready for you to start. When you start your machine the name you specified should be displayed on startup.
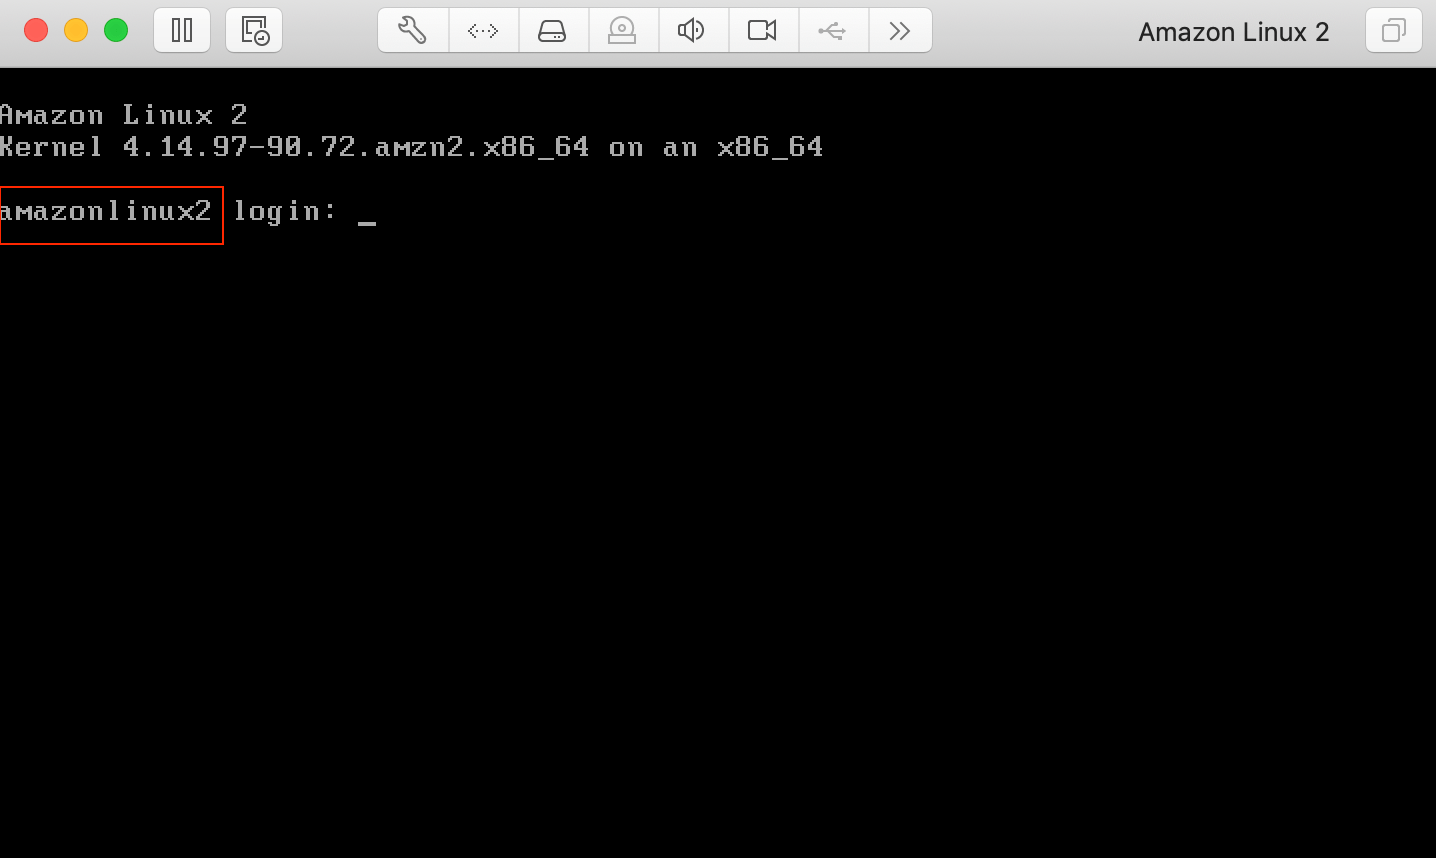
Warning
Please beware that if for any reason your settings do not apply despite all your hard work to this point, you will have to delete your VM and start again, because the user-data and meta-data files are only applied the first time you boot up your machine.
Well, that’s my Amazon Linux 2 on premise installation guide, have you tried this guide? Then let me know how you get on either in the comments below or on Twitter.


Leave a Reply